Showing posts with label wearing what I make. Show all posts

August 14, 2023

The Dress that Wasn't

 Okay - seriously, how do y'all come up with titles for your blog posts?  I'm so boring!  

Anyway, Way back during 2020 if my memory serves me, I bought a beautiful burgundy floral with every intention of making another myosotis maxi dress.  BUT then I remembered that as much as I love a good maxi, they really aren't practical for running up and down stairs and crawling around cleaning bathrooms.  So I decided to make a knee-length dress.  You know, the one on the pattern envelope! 


In all honesty, there is nothing wrong with this dress.  It has the modified to be more open neckline and I've moved the shoulders forward. I went completely collarless and added short sleeves.


I just don't like it.  It feels blah.  and heavy.  It most likely would have been epic as a sleeveless maxi - but that isn't what I made.


So, the next step is to use my vinyl cutter to put a size label at the back neckline and put it in the giveaway pile. I just don't see myself wearing this dress.  In fact, I even gave away the extra fabric already.


Photos by Carolyn taken at Carriage Corner Bed & Breakfast ;)


Sharing them all, because my friend makes me look good!

July 31, 2023

Stinger

I bought the Stinger dress by SBCC Patterns as soon as it was released.  I was smitten with some of the tester versions that I found. Now, almost 2 years later, I'm finally sewing it up. 

Stinger is a tiered maxi dress with an interesting bust dart that comes from the center front seam. The bodice is fitted and it's fitted through the hips. The dress has a center back zipper, which I don't use because I can slip it over my head.

To be honest, in 2021 I bought a beautiful dark floral cotton and earmarked it for this dress.  But hadn't gotten around to it.  I then pulled a pretty green for a wearable muslin.

Pre-vacation 2022 in my mad rush to make new dresses, I pulled this pattern back out.  I started with a size XXL

Alterations: 

  • Lower front horizontal dart an inch
  • Adjusted princess seam to match
  • added 3" to each skirt tier (which was too much and I ended up with a 2" hem and a dress that drags on the ground)
  • removed 1 ½" in a sway back adjustment, I do my adjustment according to Nancy Zieman's fitting finesse, taking ¾" at the shoulder and another ¾" below the armhole.

Fabric:  3 ½ yards of pink bandana print cotton purchased at Mook Fabrics in 2018.  The fabric was bought with the intention of making Little Miss E and I matching outfits.  And I did eventually make hers, using this fabric for Easter 2022, the remaining fabric was used in a shirt for Mister H as well as for my dress. You can see a pic in my 2022 Year in Review Post I also used the black gingham that was the main fabric for Mister H's Easter shirt as accents for my dress. 

This dress took way longer to make than it should have, but I'm okay with that.  It's done and I'm happy with it. 

However, now that it's done, I'm not really sure that I want to use the dark floral for another version. The dark floral was made into another Myosotis which I will blog soon. 

 But I will make up the green into a short dress. Which I did.  It didn't even get photos.  There was just something about it that I didn't like.  It went directly into the donation pile.

Photos by me!  Taken in my bedroom.  Practice makes better.

July 17, 2023

Gingham Is My Love Language

Well that and a good floral.

Last year, while I was shopping I saw the prettiest floral fabric that paired really well with a pale pink gingham.  And well, you know the rest of the story. Yep - I bought both fabrics.

I have been wanting to make Simplicity 8551 again, ever since I finished my first one

There's really nothing new to say about this pattern.  I did all of my usual things.  EXCEPT this time I tried to add a flirty keyhole in the sleeve.  Do you see it?  Nope, because it was horrible and I actually altered the sleeves to get rid of it! 


As I like to do, I used the pink gingham in 3 places: it's clearly on the neck facing; there's bias around the sleeves to hem them; and the ties.  The pocket facing is also gingham and I added bias to the bottom before adding a 2" hem.

If I make another version - and I still might, the neckline with the grommets is still on my radar, I will make the ties wider. 


Clearly, I took my own photos.  The other day I wore this dress and thought I'd just pull out the new tripod with remote and see if I could get any halfway decent photos.  They aren't too shabby, and practice make better.  Plus - no blog posts without photos. 

July 3, 2023

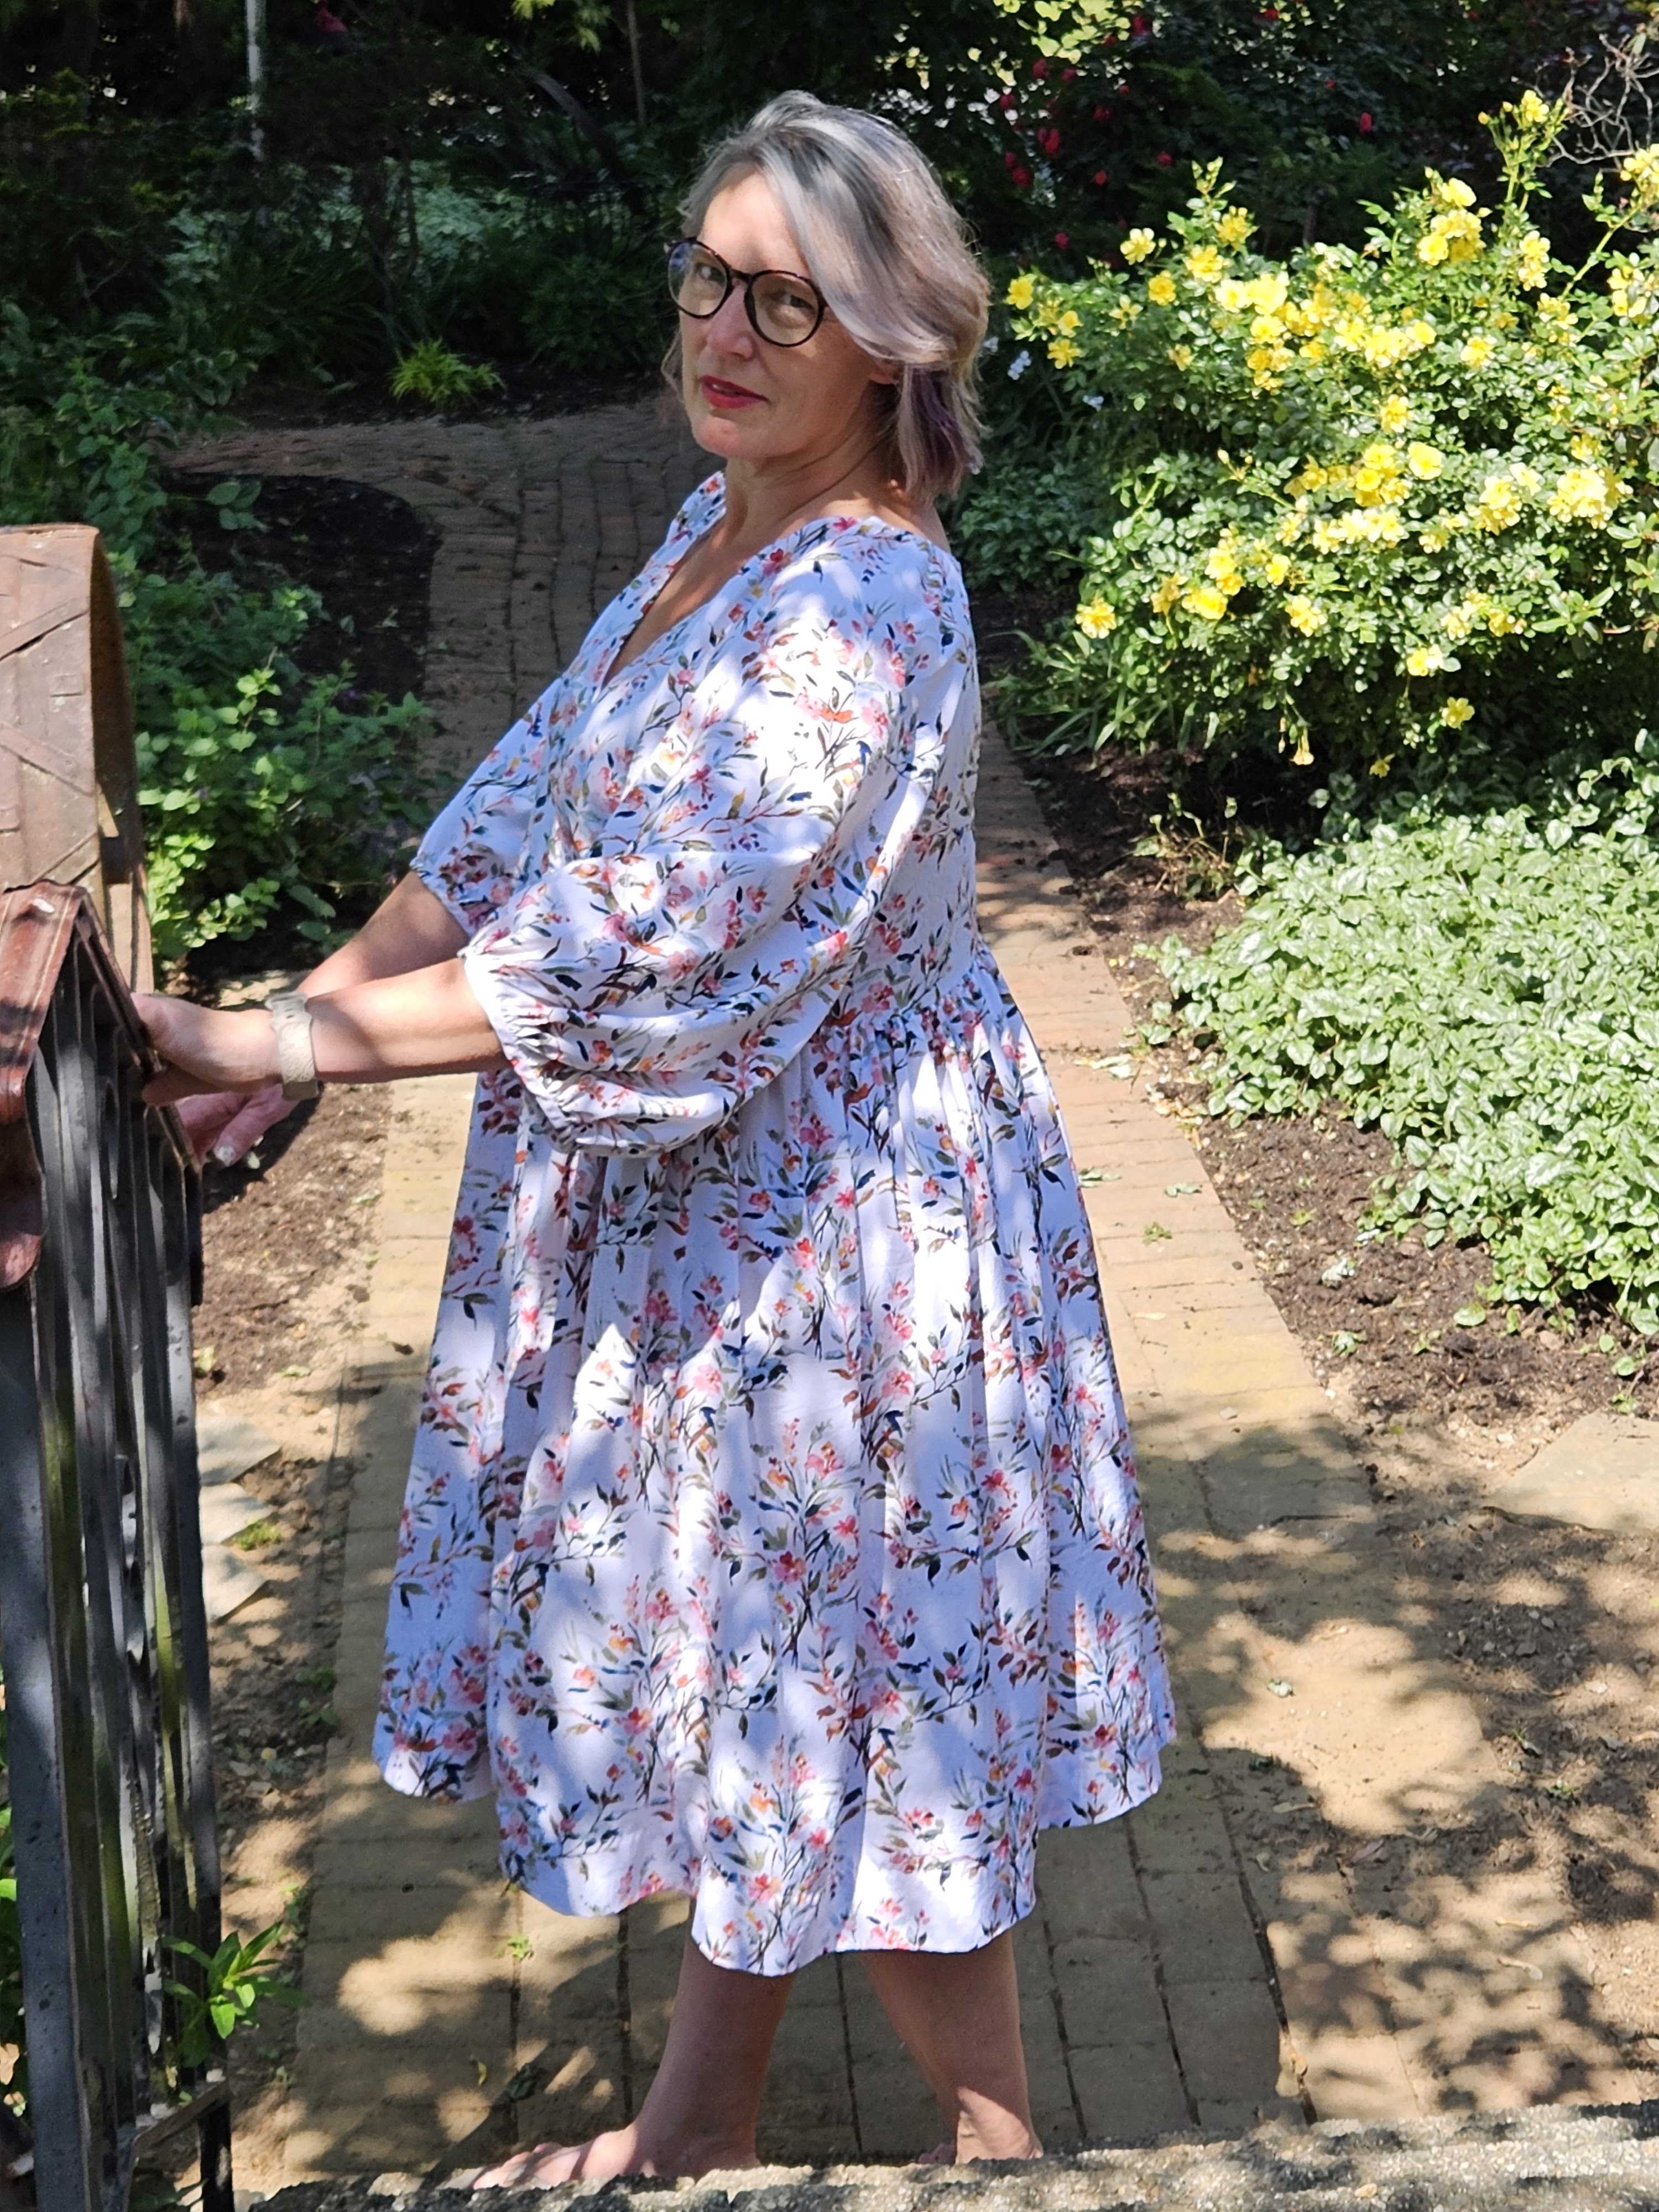
The Dress that Started it All

 Well, that's not exactly true. My Hope Dress started my love for billowy dresses with amazing sleeves. But this one comes in a close second.  I have had Jeanette's Hope saved in my IG account for years! Since 2020 when she made it. While many since have stopped my scroll, this was the first one that did.


I had a pretty piece of "silky" fabric bought at JoAnn's that I was never sure what I was going to do with it. I had originally cut this dress out in the fall of 2021, right after I made Hope, thinking the colors would make a great Thanksgiving dress. Then I added it to the vacation sewing list. And finally, started it in last summer 2022 and finished during a #CarriageCornerSewCamp.


This dress just always seems to work. It's fun to wear and I always get compliments on it. 

For this first version, I most likely made the XL size. Of course, there are NO NOTES anywhere. I had 2 different journals that I sporadically used and nothing. Based on my measurements I would have started with the XL and made no alterations. Can someone please tell me what my aversion to writing the pattern size on the traced version is?!

I had seen enough versions on Instagram to know that the wrap front can often be very low.  So after making the bodice, I tried it on, pinned it where I wanted the 2 pieces to overlap and added a snap. The only thing I wish I had done?  Add pockets!

The silky fabric means that the dress is flowing and has a ton of volume but actually lays fairly close to my body. It's also really cool, especially in the hot, humid Pennsylvania summer. I need to make more dresses with this fabric.

 Per the instructions, which I so rarely follow, I interfaced all the bands and hand sewed them on the inside.  I don't really mind handsewing, so not an issue.

For the skirt, again I measured my Hope. The waist seam on the hope falls in about the same place as the waist on this dress.  So with that in mind, I cut roughly 2 lengths of fabric by 39". Sewed the side seams, gathered to the waist and then tried it on for hemming.  After serging the raw edge, I turned up 1/2" then 2" and it's pretty perfect!  

I have already made another and I know it won't be the last one I make. Have you made McCall's 7969 yet? If not, what's stopping you?

Once again, many thanks to Carolyn for not only making beautiful versions of this pattern that made me want to make it, but for making me look beautiful wearing it.  

June 20, 2022

Backing Fabric Myosotis

 Sometimes I wish I had Roisin's knack for naming a dress, because mostly mine are called what they are:  they type of fabric combined with the pattern name and there you have it!  And this is no different.

  Earlier this year, I had Bird-in-Hand Fabrics quilt a quilt top that I had made years and years ago.  Why is this important?  Because I fell in love with the backing fabric that I picked out.

Blush Amelia by P&B Textiles


 I could see it as a long, button front myosotis dress!  Only this time, I wanted just a few things different. 

 I started with the bodice from the myosotis take 3 but added a collar and collar stand and ties from the front darts.  I will say, this was a little challenging to make, mostly because I was flying by the seat of my pants.  Since I had cut the neckline slightly deeper in the back and lower in the front, I ended up making the collar twice so that it actually fit.  And now, thinking about it 2 weeks after I made it, I cannot remember which collar fit.  Oh well, I kept all the correct pattern pieces (I hope).


 Also, at some point during construction, I freaked out and thought I was going to have to buy more fabric.  Not really sure why.  Oh, wait, because I thought I would use one width for the back of the skirt and one for the front.  Umm, the fabric is 108" wide - there was plenty!  

  I knew from measuring my blue floral dress that I needed 40" of finished length on the skirt.  I wanted this dress to have a deep hem, so I cut the fabric for the skirt portion at 44" and then I cut 1/4 of the width from each selvedge, so that there was one large piece 52" wide for the back of the skirt.  Selvedges to the center front and I added my favorite side seam pockets to the skirt front pieces.
   

 Once the skirt was constructed, I pressed up for the hem, but did that last.  Then I made the two ties.  They were cut from 'scraps of fabric' 3" wide and folded in half, turned, pressed and then topstitched.  I then carefully tucked the ties into the front waist darts before sewing them up.  


  I also sewed the collar and topstitched it before adding the collar stand.  And because I used all the facing pieces, I literally just sandwiched the collar between the bodice and the facing.  Is it the right way to do it?  Maybe no.  Did it work?  Absolutely!  Would I do it this way again? In a heartbeat! 

 When I gather the skirt onto the bodice, I try to the leave the center front flat.  So, for this pattern that means the gathers don't start until the front waist dart and then gather around to the other waist dart.  It seems to work for me. 

 And that added waist tie?  It's just tied loosely in the back.  Not really pulling anything in, just adding a little something extra!

  This extra wide backing fabric is so soft and so pretty - I can't wait to wear this dress all the time.  And buy some more fabric from this line.  I bought 2 1/2 yards and could have gotten away with 2.  I have only tiny scraps left over. 


August 22, 2019

Pink Striped Shirt

My blog titles have got so creative, haven't they?  This is an old, old shirt.  I bought the fabric from Style Maker Fabrics and honestly, it got washed, ironed, cut and sewn up fairly quickly.  I think it was early 2018 when I ordered the fabric.  See, at the time I was working on a fair isle yoked sweater that really, really needed a button up to wear under it. 

You might be asking yourself why?  Because 1.) I love the look of a shirt coming out from under a pullover - the shirttail hems, the cuffs and the collar - it's just classic and b) the sweater was being knit from lopi - which is itchy as all get out.

For whatever reasons, I didn't finish the sweater.  It was a test knit and there were sizing issues FOR ME. 

I used New Look 6470 for the shirt and very carefully measured myself and then the pattern flat.  I added some space where needed.  I worked on the shirt during Spring Sew Camp 2018.  I knew as I was working on it that it wasn't going to fit me.  But I plodded on.  I'm glad I finished it. 

For the back yoke, I cut the piece in half and added a seam allowance and then cut the stripes on the bias.  The yoke facing was cut on the normal gain for stability. I burrito'd putting the yokes together so the shoulder seams are enclosed. I made the back pleat a bit wider to give some more room at the hips.

What you can't see, because I didn't unroll the sleeves is that the shirt has long sleeves with a tower placket and proper cuffs.  


While I can't currently button up this shirt and still move, it will get worn over a tank or cami.  It's a great layering piece.  


This is a good shirt pattern.  It currently fits through the shoulders, so I need to figure out what to do to add more width around the bust and hips - FBA?  Maybe.  While I don't have a large bust, I do have a large rib cage and a FBA might give me enough room to be able to button this button up shirt.  Hmmm, let me add this project to the ever growing list of things to make. :)

How would you fix this pattern so the shirt can button and movement would be possible?  

July 4, 2019

Swing Dress

When a certain indy pattern designer came out with a fun and lovely swingy tee shirt dress - I really and I mean really - wanted it!  

But - I'm team pattern pattern.  I'm also team trace because I like having the original pattern when I need to go back to it.


So, I chatted with my dear friend Carolyn - who took all of these photos - in fact, I still haven't even downloaded the photos that JB took alongside Carolyn.  Soon - Maybe I'll just have a "fashion show' post with the photos he took!


The pattern is New Look 6469 and it appears to still be available.  But it's just a swing dress with raglan sleeves.  I have very square shoulders so raglan sleeves are good for me!  


If I remember correctly - I added 2" to the length of this dress.  It was made the night I was suppose to be packing for our Italian vacation.  I made this dress again and added a bit more length for our last vacation and it got cut up into a top when we got home.  


The fabric was a 3 yard cut from Fabric Mart that I love!  It had been pulled from the closet more than once and put back because I didn't want to 'waste it.'


While I mostly wear this dress during the winter with tights and boots - it works just as well in the summer.  It might not be the most flattering for my shape - but it's comfortable and easy to wear. 


This pattern is still on my radar to make again - with contrast sleeves - as soon as I find the right combo of fabrics.  I'm thinking a floral with stripes or polka dots would be fun.  Also - I think it could be just a smidge shorter - maybe the 2" I added?  What are you thoughts?  Do you wear comfy dresses because they are easy even when they aren't the most flattering thing you own?  

May 30, 2019

ESP Sheet Dress

I made another ESP dress.  It would appear that I made a bunch of the Decades of Style ESP Dresses in 2015 and then, even though I love the pattern, didn't revisit it until this past March.  Interesting.

In March, before Spring Sew Camp, I moved all of my fabric from the fabric shelves to an interior closet.  There were a few pieces of fabric that didn't make the cut to stay in the collection and they landed in a give away pile at #CarriageCornerSewCamp.

Main fabric shelves - organized by type of fabric.
As you can see, there's still room for snacks!

Overflow shelf to the top left of the fabric. This is all quilting cottons, nicer cottons for Jay's shirts and fabric bought specifically to make something for Eleanor
In the pile of fabric that I didn't really want to get rid of, but there might not be room for it, was a beautiful blue floral fitted sheet.  Yep - I've finally joined the ranks of people who've made clothes from old sheets.  And you know what?  I know why they do it.  This fabric is so soft.

finished dress just hanging out
3 of the 4 previously made ESP dresses are in heavy rotation in my current life as an innkeeper.  2 of them have the lowered neckline and 1 of them isn't even in the ESP posts I linked back to.  Also, in my post with the black gingham ESP, I share with you how to lower the square neckline going into a raglan sleeve.

Carolyn cracks me up when she takes photos.
You can see the bust is just a little bit too snug.
And - when I lowered the neckline, it also made it really wide.
Anyway - during the Spring Sew Camp after making Vogue 8962, I grabbed my sheet and got busy prepping it.  Then I put my ESP pattern on it AND without tracing the bodice, I cut, narrowing it by 1" at the waist seam.  I also cut the back on the fold because in my other ESP dresses that are too big, I NEVER use the zipper and why match a zipper over a waist seam if you are never going to use it?!


I also fully lined the bodice and used the burrito method to hem the sleeves (fully lined, remember?)  There are no photos of me making this up because I didn't think that far ahead - but someone at sew camp saw me rolling the dress to make the burrito happen.


I may have been just a bit aggressive with my alterations.  This dress is just slightly too tight. 

really too tight in the back and I need a sway back adjustment
Changes for next time:

Move the shoulder seams in just a bit - they are really wide
Add a 1/2" at the waist
Cut the back 1/4" off the fold
Add a sway back adjustment

Will there be a next time?  Yes!  I've already bought the fabric and I want to try playing with some color blocking and putting the facings on the public side.
LinkWithin Related Stories Widget for Blogs