December 20, 2018

Dressing Like Gramps


This little lady is already pretty particular about her clothing.  But, I knew she liked this shirt and matching Gramps would be fun!  This little girl is still pretty tiny, but tall.  So, GiGi has been making her clothes custom - The flag shirt is a medium width and an extra large length, with more length added.  Again, I added 3" at the lengthen/shorten line and I think the length is just about perfect for a tunic.  For this shirt, I didn't add any elastic or drawstrings at the waist.  While I really liked the concept on her flannel shirt, I know that she doesn't like anything too tight or restrictive.  I thought I might be pushing my luck with the fabric because it's still a bit stiff


If you've been paying attention - so far I've made Daddy & Daughter sweaters; coordinating Eleanor & GiGi Sweaters; Matching Gramps shirts and I made Momma & baby matching outfits.  I think this wraps up the coordinated clothing - all before her second birthday! 

Where do you stand on matching outfits?  Love 'em or leave 'em? 

December 6, 2018

Flying His Flags

So, you've recently read the post on the shirt inspo and now we're ready for the next part - the actual flag shirts.

For JB's shirt, I cut the under collar, front facings, inner yoke, pocket and a little strip of fabric from the navy blue pin dot.  All shirts were sewn with red thread.  The little strip was folded into a 'hanging loop' and added at the back yoke over the pleat.  It's a fun little detail and I like it.  He's not ever going to use that little loop to hang his shirt up, but I can tell you it's handy for grabbing him to get him back in the kitchen. 


Back of the shirt with the collar turned up.  


I did not try to match anything on this shirt - just sewed it up!  


It was a horribly cold day in October when I managed to get these two together and take some pictures.  We were at Liberty Park in New Jersey.  Eleanor was a trouper, Gramps wined - just a bit :D


Gramps shirt is New Look 6197 with no alterations at all.  I haven't asked him how the fit is compared to the other shirts, but I will say he hasn't worn it a lot.  That could be because he has 21 other shirts in his closet and we are headed into the themed shirt portion of the year.  He's been wearing Christmas shirts since Thanksgiving - he has 4 of those.  


This is probably my favorite shirt of the whole bunch.  You can see just how long Eleanor's shirt is - tunic length.  

Next up:  More info on Eleanor's flag shirt.  


November 22, 2018

Making Boy Clothes A Bit More Girly


Once I knew that my daughter was expecting, I started collecting all the patterns.  She did not find out what she was having until the handed her the baby.  So - I had to buy infant, boys and girls patterns.   I remembered how Melizza of Pincushions and Treats dressed her son up in the cutest little button down shirts ever.

Not wanting a good pattern to go to waste - last Christmas I made Eleanor a tunic using McCalls 6016 and left overs from #flannelpantsfactory.  But - I didn't want her shirts to look too boyish.  So, for her Christmas tunic, I lengthened the body 3" at the lengthen/shorten line and because it was a flannel shirt, I extended the sleeves to be full length.    Oh - and once it was done, I zig zaged some elastic at the waist on the inside to pull it in a bit and make it a little bit more feminine.


Krystle says she loved this shirt and she wore it quite a bit, until the cuffs got too small.  I then cut the sleeves short and rehemed them and she wore it until it didn't fit.

I also made her some pale pink wool leggings to go with this camping tunic.  This flannel was left over from my SIL's flannel Christmas pants.  I think this was a fun way to dress her up in flannel and keep her warm. 


All pictures were taken in January 2018 while we were on a family vacation.  Eleanor wasn't quite walking yet and she'll turn 1 right after we get home. 

November 15, 2018

Shirt Inspo

Many of you know that I make JB shirts.  I started making them years ago using the now out of print McCall's 4399.  A quick search shows a very similar current McCall's pattern.

I just want to say - I'm bored.  I'm bored with this pattern.  The only way to really jazz it up is with fabric - and using a contrast pocket and under collar.  A quick count in his closet shows that I have now sewn this pattern up twenty-one (21!!) times!  And all but 3 of those have been made in the last 15 months or so.  I've gotten pretty good at matching the pattern across the placket - I guess the next thing to do is match the pattern all the way around?  And the sleeves?  I would say 95% of the time you can't find the pocket, I've gotten pretty good at that matching.

But, what I really want to sew is shirts like these jazzy little numbers:


Look at those fun details!  Contrasting fabric on the cuffs, button bands, collar stands and under collars.  

But you might have noticed one thing.  Those are all tailored button down shirts.  JB is NOT a buttoned down guy and while I could make shirts like for him - it would be a waste of my time and fabric.  I'm better off leaving those fun details for me.  So - what do I do?  I find a new shirt pattern that has a few places to play.  

For the flag shirt, I started with New Look D0966 (6197)


This was a great jumping off point for adding a little of interest to my sewing projects.  The New Look pattern has a back faced yoke and separate front facing piece, but it's still only a one piece collar.  I am still on the lookout for a men's pattern with a collar stand.  

Also, while cutting this one out, I decided to make E a matching tunic.  More on both shirts coming in a future post - I need more photos and want to get this one posted.  

But - while we wait talk to me.  Do you sew for anyone else?  Do you do it because you like it or because they do?  Do you ever get bored with the garments you are making?  How do you keep it interesting and exciting?


November 2, 2018

The Cutest Little Project Bag

If you read the last post, you know that I was contacted by The Sewciety and asked if I'd like to receive one of their first subscription boxes. 

I was honored to receive the box.  I did an 'opening' reveal on my IG stories and have it saved to my profile


The box itself is sturdy and has quotes on it.  It is suggest that you keep the box for project storage.  It would make a neat pile if you have more than one.  I plan to keep mine and put the supplies I need for an upcoming quilting class (who am I?!) into it. 

While I have every plan in the book to make the little top that was included with the box - my sewing time is so limited these days.  So, I made the little wristlet.  It was everything a quick project should be - quick, fun, easy and adorable! 


Once I trimmed the selvedges off the fabrics, I was ready to start.  I would say, the only thing I don't love about this project is the placement of the strap.  I wish it curved around one of the ends.  I tried doing that, but with the stabilizer, it really didn't want to. 


As you can see I used the lining fabric for the outside of the strap.  Just to add a little fun contrast. 

I will say, I had a little bit of trouble with the zipper insertion - but that was all me.  The instructions were clear - I just thought I knew better.


Again - super easy sew and I would make it again.  I love how the bag opens wide!  That both fabrics coordinate.  This project would be a great stash buster and make cute little gifts. 

I love that everything I needed to make this little wristlet pouch was included in my Sewciety box.  I would absolutely subscribe and get more boxes.


Inside of the pouch - see how wide it opens up?  I love it!  Did you get a Sewciety box?  What are your thoughts? 


October 11, 2018

Being Noticed

Recently - I've been being noticed on Instagram.  It feels strange and wonderful at the same time. 

In September, Brianne of The Huntswoman Group included me in a post on the Curvy Fashionista.  This post focused on 7 Plus Size Sewists to Follow on Instagram.  After that - my followers skyrocketted and I felt obligated to post. 

See, my instagram is not staged at all.  I'm often not worried about taking the perfect photo, but rather about posting something I want to share and, honestly, my IG posts are all over the map you might see sewing, knitting, food, dogs, or possibly Eleanor. 

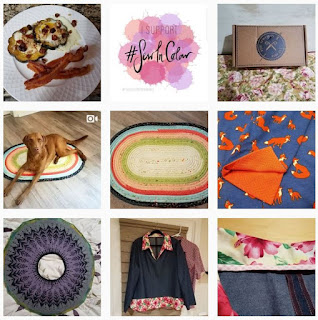
Top 9 IG Posts

Then, as if that wasn't enough - I was contacted by The Sewciety and asked if I'd like to receive a complimentary box for review.  Seriously - I am not one of the cool kids.  I do not get asked to do these kinds of things.  And with running the B&B, I'm pretty selective about what I agree to do in my free time.  But - I said yes to this one and you can see my box in the photo above.  

I'm still learning all about stories, but I did an Instagram Story showing the unboxing and I'll be posting about one of the projects in a week or so.  If you are interested in  getting your own box, follow the link above use the code GMARIEBONUS for an extra cut of fabric in your first box.  

So tell me, how do you feel about being noticed?  Do you feel like you need to step up your game?  I do.  Do you feel like you need to have a perfect IG grid?  I kinda do, but I know it's not going to happen.  These days, I'm happy to post daily and be noticed.  

September 20, 2018

Full Legged Pants

Last year, we had a very lovely guest from England who looked so put together every.single.day.    What was she wearing?  Beautiful floral wide legged pants and a slim tee.  Sometimes with a scarf thrown around her neck, but often not.  
Clearly, I could skip the ice cream
I have lusted after that outfit.  I mean - seriously lusted.  I want to look that sleek, polished and put together.  This outfit is not quite it - but it's getting there.  After seeing KS Sews make McCalls 7757, I knew I wanted them.  So, the pattern number was added to my list of  "Must Buy" patterns and picked up at the next sale.


They were sewn up in a rayon that I had received from Carolyn in a give away she had years ago.  Way before it would have been fishy for me to win ;)  I paired them with an ogden cami (but we aren't talking about that now). 


By the time I made necessary adjustments - added at the center front and center back waist and added at the hip - the hemline was over 36" around!!  Each leg!  I can see wrinkles in this photo from my hip to the inside of my knee - but I have no idea what that's trying to tell me.  Also, with the hem this big, it was hard to walk.  My shoe would get caught in the hem - not good.  


While they are very comfortable, this wasn't the sleek, chic look I was going for.  I have since altered the pattern to be a little less full at the waistline, a little lower in the back, and a little less full (okay, a lot) at the hemline, but still giving the allusion of falling straight from the hip.  

here you can see just how big the hem is


I don't think the ogden is doing me any favors in the silhouette department.  Since taking these in, I have worn them with a fitted white tee and got good feedback from my knitting group.  I just haven't made another pair yet.  That's next up on the cutting table.   

August 31, 2018

All's Quiet on the Pennsylvania Front

Hey everyone - 

I have been sewing, honest.  But I don't have anything fabulous to show for it.  

For example - this dress.  This is my tester version of the recently released Cashmerette Rivermont Dress.  While I love the fabric I used and the dress that I made - I don't love the photos that were taken of it.   

My tights are too dark, my shoes are completely the wrong color and they dress needs a bit more styling.  

But - does that stop me from wearing it?  No, it's just stopped me from blogging about it.  In the case of the Rivermont, I actually made the dress again and I really super love that version - even if it does highlight my tummy just a bit too much.

So - what else have I been doing, but not blogging about?  

1.  sewing for Eleanor.  She got an entire winter wardrobe filled with leggings, onsies and flannel jumpers.  Then she got a mini summer wardrobe - couple of pillowcase dresses, a onsie (which promptly had to be cut into a tee because she's potty training), and some shorts.  

2.  Jay's shirts - they just keep being made.  I cut a bunch, then sew them up in color stories.  I've added 3 blue shirts and then 3 Patriotic themed shirts to the closet this year.  He also got another motorcycle shirt before we went on vacation. 

3.  We've gone on 2 vacations.  

4.  Knitting - I have several new shawls and a cardigan that need blogging.

5.  Wide legged pants and an Ogden cami - I wasn't thrilled with either of these and rather than make pattern alternations and make them again and again until I was happy, I moved on to something else. 

6.  Button front shirt - see notes on #5 above. 

This year - I've realized that I'm flitting from pattern to pattern and not ever making anything that I'm really happy with.  I just sew it up once and then move on.  Working on correcting that.  

What stops you from blogging?  

May 2, 2018

Channeling Mrs. Roper

 When Decades of Style posted a photo on their Instagram indicating they were working on a new Decades Everyday pattern - I commented that I'd love to test for them!  Seriously.  With the exception of the Given a Chance Dress, I have all of the Decades Everyday patterns.  I have 3 ESP dresses in my closet and I love them!  I have even made a couple of their other patterns.  

Decades of Style have been amazing to work with.  I had reached out after making my first ESP Dress and got an incredibly detailed response on lowering the neckline of that dress and given permission to share the info.  And they were fabulous this time as well.  I was given the pattern for free, but the thoughts and opinions on the pattern are my own! 

This pattern is called the TLC Caftan.  This dress has a cross over top which is sewn into the waist band, pockets and side panels.  You can chose to sew a short or long dress and I would guess that you could even interchange the side panels using either the narrow or wide side panels on either the short or maxi dress options.  I have made the dress with the narrow side panels. 

I finally found a use for this lovely, leaf printed rayon challis that has been in my stash for a long, long time.  I honestly think I bought it almost 20 years ago.  If my memory serves me, I bought it from Nancy Cornwell's sewing and fabric store in Seattle, which she closed in late 1999 or early 2000.  So . . .

But the fabric was perfect for this.  It's lightweight and cool and was very easy to use.  The pattern was fairly quick to make.  I will say that the instructions call for two different fabrics and I didn't have a complimentary contrast fabric that would work, so I only used one.  In the future, I might actually try using wide, stable elastic for the waist band and I would honestly use elastic to pull the sides in (it's inside) rather than the ties.  

Changes I made to the pattern in testing:  I made a small full bust adjustment - which I don't think I needed.  I also made a 1 1/4" sway back adjustment and added 3" in length to the skirt and side panel pieces.  I then put in a deeper hem, think I could have gone deeper still. 

I forgot to mention that I did the used the size 18 bust with a FBA and the size 26 skirt because I need more room for my hips.  

Couple of thoughts - while the instructions are clear and easy to follow.  You want to be very careful marking and sewing the arm openings on the side panels.  Also, I finished the edges of the arm panels, before stitching them to the side panels, it was easier to press and turn them when they weren't attached.  Next, I think I would use elastic on the inside rather than the twill tape or ribbon to pull the sides together.  I just think it would make it all around easier to get into.  

While I don't think this is the most flattering look on me - I will still probably wear it.  I think - for me and my current lifestyle - the most likely use will be post shower but when I still need to be presentable for guests.  I really want to try the full length version.

April 26, 2018

Just Another Bowling Shirt

I really have to come up with some way to spice up these shirts for JB.  Honestly - I'm getting bored with sewing them and I'm sure you're tired of reading about them.  Honestly, there is nothing new to say.  I'm still using McCalls 4399 and just changing up the fabrics, buttons and how I sew the hems and button bands - as in accents with the thread. 


This fabric was a quilting cotton that I purchased at the craft store probably 5 years ago.  I liked the print.  I bought 4 yards - which is honestly about 1/2 yard too much, but I like knowing I can match the print across the button bands.  Once I got fussy about matching the pattern across the button bands, I started cutting the shirt out from a single layer of fabric.  I have a full back pattern piece and only 1 front pattern, 1 sleeve and 1 collar.  Oh and the pocket pattern which I trace off several.  I did a blog post back in October about how I match the pattern - you can read it here.  So far, I haven't been too worried about matching the print up across the side seams, but I imagine that's coming next.  


In this photo - JB is showing you the barn door he installed over the panty opening in the B&B.  He did a great job.  That door gets so many comments.  


Nobody know what's he's doing here.  But he was ready for me to snap the photo so he could breathe!  Doesn't this fabric scream tropical vacation?  


In this photo, you can see I nailed the print matching!  Also - can you spot the pocket?  This shirt has one.  In fact, all of his recent shirts have a pocket - he needs someplace to keep his glasses!  The buttons were in a baggie of shirt buttons I either added from a FabricMart purchase or from Fashion Sewing Supply - I can't remember which.  They were perfect for this shirt.  I always add 7 buttons, so they are spaced a little closer than the pattern indicates.  I use my simflex for positioning the buttons evenly up the placket and start the first one at the bottom, the same distance as the side slits.  
 

April 20, 2018

An Oldie

So this morning when I was getting dressed, I grabbed a fun trapeze dress and some tights.  As you are aware - my personal blog has suffered a little bit with the move to B&B ownership.  I try really, really hard to blog over at the B&B every week - but lots of things that I've made don't make it to my blog these days. 

I'm getting dressed and I think - I'm sure I've blogged this.  I made it forever ago!  In fact, I made it before we moved in anticipation of making The Princess some maternity dresses.  But kids these days don't want lose flowing maternity clothes, they want to rock the bump!  Oh, and I never even offered this dress to the Princess - although she would have looked much cuter wearing this that I do - even with her baby bump.

The pattern is McCalls 7348 a learn to sew for fun pattern.  I made view A - scooped neck, short sleeves and straight hem.  I feel like the dress is a bit short for me - so I only wear it with tights - no bare legs on me with this one.  The fabric was from a FabricMart bundle and I loved it! 

If I remember correctly - this was a quick easy sew done completely on the sewing machine.  I used my duck bill scissors to trim the extra seam allowances away from the neck band and hems. 


What I'd do next time:

  • add about 3" in length
  • scoop out the neckline a bit more  
You can see from the side view here that it's a bit short for me.  Today was very, very windy and I was a bit worried about flashing people in the Lowe's parking lot - but I made it through without inflicting permanent damage on anyone.  

While this maybe isn't the best silhouette for me to wear, I don't really care.  It's a comfortable t-shirt dress that I feel confident throwing on and heading into the kitchen in the morning.  I also don't worry about cleaning bedrooms, bathrooms or doing laundry in this dress - it's that's comfortable.  And I feel put together.   
The booties are from Clarks from several years ago.  They are super comfortable and I finally found some new leather laces to replace the one broken lace so they are back in rotation again. 

Oh, and check out the arbor that JB built in front of our side of the house.  It's a huge beast of a thing - there are 4 sets of posts and three arbor tops.  There are berry bushes and climbing roses at each of the sets of posts.  I can't wait until I can send him out in the morning to pick fresh berries to serve at breakfast - that time is coming and I'm excited for it! 

So - do you have anything you know may not be the most flattering on you but you wear it anyway? 

Oh - and look how long my hair is getting!  And can you tell I'm letting the gray just come in?  I'm not sure JB is thrilled - but I don't mind it.

March 31, 2018

Similar But Different

Every year since I can't remember when, I have knit JB and the girls a new pair of socks for Christmas.  Historically, they are the first things I knit each year - because I like knowing they are done.  

Sometime last Summer, Wendy at Lancaster Yarn Shop {which is also my LYS} got a pretty new color of Crazy Zauberball Malerwinkel and thought - wouldn't it be fun to make the girls socks out of the same yarn?  

So, I bought 2 balls, 1 ball is enough for a pair of socks, and then promptly put it away.  The one rule to #christmassocksforall is that they have to be knit in the year they are gifted.  

At some point between purchasing the yarn and starting knitting, Wendy and I had a conversation about knitting socks with zauberball and she mentioned a striped pair she had made.  Well, that planted a seed, but in 2018 I'm not spending my money on silly little things like patterns - not when I know how to knit a pair of socks AND have stitch dictionaries on my shelves.  

So - first things first - I caked my 2 matching dye lot balls of Malerwinkel into pretty yarn cakes.  Next, I pulled out the stitch dictionaries because there is absolutely nothing that will bore me faster than a plain stockinette sock, except maybe 1x1 rib.  UGH.  

Because I was using both yarn cakes on each sock, I didn't want to knit 2 at a time, but I still did them on my circular needles, and toe up.  To keep the stripes uninterrupted and balance out the yarn cake usage, I used cake A for the toe, heel, and ribbing of socks 1 & 3 and cake B in the same places on socks 2 & 4.  

With lots of numbers in my head, I grabbed US1 {2.25mm} circular needles and got started.  I started with a 72 stitch sock and worked 2 repeats of the stitch pattern on either side of the foot.  Put the heels on waste yarn, worked up the leg, then did 3 repeats of the pattern all around for a cuff.  Finished with a tiny, tiny bit of ribbing and bound off.  Quickly knit an afterthought heel and sock 1 was done in 3 days!  There are very, very detailed notes on my ravelry project page so that I could repeat for sock 2.  

First Pair Done!
I forgot how quick it is to knit single socks.  It took me about 3 days per sock to knit these.  Back in my bus commute days it would take 2 weeks to knit a pair of socks.  I'm also happy to report that these socks are the same size - there were no gauge changes between sock 1 and 2.  

Second Pair - Similar, but Different
With the first pair complete it was time to start the second.  I knew that a 72 stitch sock would be too big, so this time I only did a 60 stitch sock.  I tried something new when starting the second pair.  There is a technique I learned from knitting top down socks where the decreases go all around the toe.  I wanted to try recreating that from the top up and it worked!  
It Worked!
This time, I worked the ribbed lace up the entirety of the leg as well as along the edges of the foot.  
Side By Side
Pile of Socks
With the leftover malerwinkel I've been knitting "similar but different" socks Eleanor.  Sadly there is a gauge issue between her first and second sock, but I don't care - she's a baby and won't wear them for long - that is if they aren't lost first ;)

It feels good to have these done and in the Christmas Box reading for gifting already.  
LinkWithin Related Stories Widget for Blogs