November 21, 2019

Jelly Roll Rug & Placemats

Last year - 2018 - I took a class to learn to make a JellyRoll Rug at a darling local shop.  Oh, and if you are interested - Carriage Corner has partnered with The Old Country Store to offer a discount to guests attending classes. 

Anyway - I had seen Jelly Roll rugs on Instagram and I was smitten!  Bitten hard by the want to make my own rug.  I even had a jelly roll purchased - I just hadn't started yet.  So, I signed up for the class and had a wonderful time!  So wonderful in fact, that I purchased a stack of fabrics to make jelly roll placemats for Carriage Corner.
Stack of fabrics in our basic theme colors

To make 12 placemats, I purchased 1 yard each of 8 fabrics. You can now purchase a pattern for jelly roll placemats and I would urge you to do so, but there wasn't one available at the time, so I created my own.  Also - I wanted an oval placemat, just like my rug, although I'm really digging the rectangles now too.

Anyway - I'm going to give you a pictorial of what I did - but without too many instructions, because you know, we should be supporting other makers.  So, if you love the idea of making your own oval placemats, please purchase the original rug pattern and have a ball.


I cut all of my fabrics into 2 1/2" wide strips - the size of a jelly roll strip!  And then I seamed each fabric together in the order I wanted them using a diagonal seam - just like you would seam bias strips together.

There is a narrower strip of batting in the middle of the fabric strip and then the ends are folded over and then folded to the center - think bias tape.


Sew the end with the fold so it doesn't come unfolded.  I found my blind hem foot to be the perfect tool for this step.


The end of the stripe needs to be tapered so it looks pretty when you finish.

 Figure out how long you want the center of your placemat to be.

 Ease around the corners.  Stop when necessary and press everything flat.
 Sew the strips together with a zig zag stitch.  Keeping the seam you already sewed oriented in the same direction at all times.


Stand back and admire the first placemat you finish.  Hope you can make 11 more just like it!  They are similar, but not all exactly the same shape, even though I started the same each time.

I saw a beautiful one fabric rectangular Jelly Roll rug on IG and I think the next time I head to The Old Country Store, I might pick up the rectangular pattern and then use some of my large pieces of quilting cotton to make some new bath mats for our guest rooms.  Because these cotton rugs filled with cotton batting are nice.  And they launder well, and I need new bath mats! 

What's your favorite item you've made for your home? 

November 14, 2019

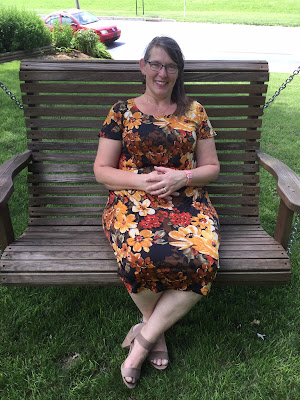
Fall Ottobre Dress

I have long been on the lookout for an easy to wear, dress up or down tee shirt dress!  Even though I have a great pattern - I'm still always looking for the next best thing.  Why is that?

But truthfully, when I have a beautiful piece of fabric, I go back to my Ottobre Tee Shirt Dress.  I first made this dress in 2013 and the only change I made to the pattern was to add 2 fisheye darts at the back waist.  At this point in time I think I've made 7 dresses from this pattern and see no reason to stop anytime soon! 

I've used ponte, ITY, and a painted sweater knit.  This dress just works for me!  The pattern, if you are wondering, is from 5/2013 and it's the Friday Evening Dress (4B).


The Fall version of this dress was made in January 2018 in a last minute rush to make something new for me to wear on vacation!  This dress is so easy for me to whip up and know it's gonna fit and i'm going to feel great wearing it. 


This time I used a beautiful Fall color ITY from FabricMart.  I can make this raglan sleeved dress with just over a yard of 60" wide fabric and have it done in about 2 hours from cutting to hemming.


This dress kept me warm and feeling good while we traipsed all over Italy & France worn with knee high boots and tights. 


I don't even mind how my back view look when wearing the Ottobre dress.  With 4 darts - 2 shoulder and the 2 added fisheye darts in the back to counteract sway back pooling, 4 raglan seams, and then 4 hems - it's a quick one!

The dress doesn't really cup my rear, but the wind was blowing.  It does, however, hug closer to my back thanks to the added darts. 

If you have this issue of Ottobre - try this dress!  I don't think you'll be mad about it.  You can see some of my many versions of this dress. There will be more - I already have one made up from a FabricMart bundle that's just waiting for photos.
LinkWithin Related Stories Widget for Blogs