December 26, 2017

Fall Back

The Halloween shirt (seen on Instagram) was the first of the 10 bowling style shirts that I made JB.  Since I haven't been sewing a bunch for myself lately - I cannot promise you that I won't drag all 10 shirts out into posts of their own.  

Along the lines of  "If It Ain't Broke, Don't Fix It" I'm still using McCalls 4399 - it is long since out of print, but M6972 would work or M7206 if you wanted to do some print mixing - in fact, I might need to add this pattern to my stash during the next sale.  


We had friends vising from Seattle and I asked them to take his shirt photos.  There were 2 reasons behind this - 1.  JB thinks one photo from each angle is enough - figure out how to make it work and 2 - he always changes into his outside working clothes while I'm still working.  


Back view - you can see there is plenty of room here to go around his slim hips.  I feel like the sleeves are a wee bit too long - but he says their fine.  I might put a deeper hem in the next batch I sew up.  

Apparently - Anna was making him laugh.  While JB's first comment when he saw this shirt was - it's bright, it's got quite a bit of kitchen time this Fall.  Guests always comment on how seasonally appropriate his shirt is and then there's Snoopy.  I mean, who doesn't love Snoopy?  


Just look at that pattern matching - across the pocket and the button placket - WIN!!

December 19, 2017

Ursula - the First

I am a knitter as well as a person who sews her own clothes.  In this grand cross country, life changing move, I am very blessed to have found an incredible LYS.  The Lancaster Yarn Shop is everything I could want in a shop - the owner is knowledgeable, friendly, and incredibly helpful - not only in the realm of knitting.  She often tells JB & I about things to do, places that have to be seen along with sharing great produce stands and restaurants.  

In January of this year, I signed up for her 4 week class to knit Ursula by Kate Davies.  This had several items on my knitting bucket list that I wanted to try - stranded colorwork and steeking.  Steeking is scary stuff, my friends, scary stuff!  I bought all the yarn to make a darker colored version of this sweater and then I fell in love with a stranded colorwork hat in the shop and had to have a sweater in those colors.  If you look closely you'll see my hair matches the colors in the sweater.  


I learned a lot of things making this sweater.  First - swatch, swatch, swatch and then try on.  Multiple times.  Because even though you've got gauge with your swatch, you might relax as you carry on.  


While I like this sweater a lot, I'm not sure I love it.  On me, to me - it feels a bit frumpy.  I know it doesnt look that way to others (or else the knit night ladies are all just being kind). It could also be how I styled it.  We had been at an industry conference and I was over it by the time I wore this outfit.  We had also spent 2 hours in the car coming home. 


It looks good from the back.  

In the future, I would add the ribbon to the button bands, but I would not actually add buttons.  I would use snaps - possibly magnetic ones.  This sweater will get worn - just not as much as I had hoped after all the work that went into it.  


I have enough yarn left over to make Eleanor a similar, but different sweater.  AND I still have enough yarn to make another version of this sweater.  

December 14, 2017

Holiday Tree Napkins

Over at my other blog (Carriage Corner) - I posted all about my holiday table settings this week.  Several years ago, I stumbled across a blog that showed step-by-step instructions for making these tree napkins.  I can no longer find that link.  At that time, I made several sets of napkins and gave all of them away!  I guess in actual fact - I've given this set away as well, hmmm. . .


Anyway - there's still time before Christmas to make a set or 6 of these trees and give them away to everyone you know.  They'll love them until they have to fold them.  ;o)

To start, you need 2 coordinating fabrics - these can be holiday themed or not.  I like to press my fabrics right sides together and then fold them in half, so you have 4 layers, both right sides together. 

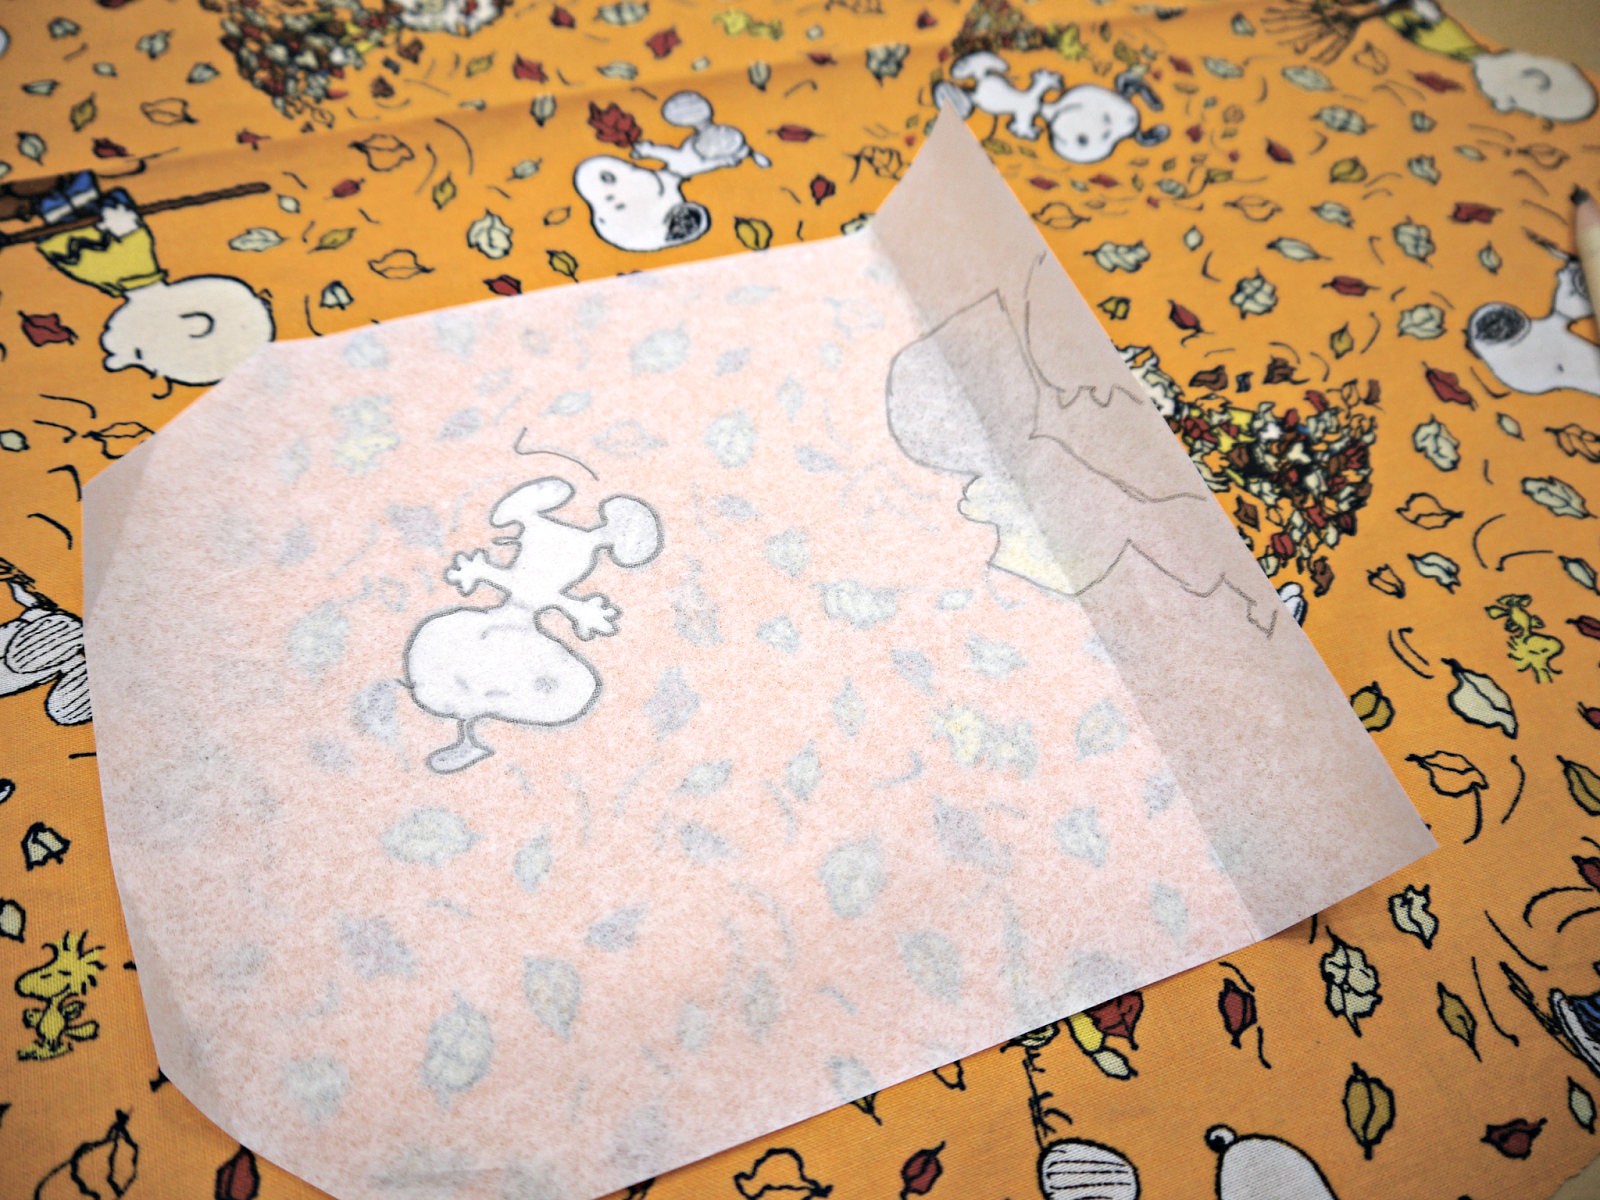
Next - using the string, a pin and pencil - draw the largest circle that will fit on your fabric that is folded in half.  Make sure not to go into the selvedge.  I like to draw my circle on paper, but you can go straight to your fabric if you are a rebel.  The reason I do it on paper (no photos) is so I have a pattern AND to be able to fold my circle in half evenly.  Because these trees are made from a half circle of fabric. 

Lay your pattern on your fabric and cut out as many half  circles that you need.  At the very least you'll need about 2/3 a yard of 2 fabric to make 4 napkins.  I made 12 for the B&B.  I bought at least 2 yards of fabric to get my 12 napkins.  I honestly cannot remember if there are 'scraps' of these fabrics shoved into holes in the fabric shelves. 

Once the fabric is cut - it gets really easy from here.  Your fabrics are already right sides together and ready to sew.  Sew them up with a 1/4" seam allowance - or bigger if you're more comfortable with 3/8" or 1/2".  Just remember to be consistent and leave an opening for turning right sides out. 

I like to baste across the opening.  I find it helps me to get an even edge if I press the opening back using the basting as a guide.  


Once you've sewn all the napkins, trim the seam allowances.  I like to use my pinking shears for this part.  I find if I use the pinking shears the curve clipping is done for me.  Plus, I like the way the pile of pinked edges looks.  


Next, I sample thread colors and decorative stitches.  This time I just went for the triple zig-zag.  It was easier to maneuver around the corners and it looks like garland when the napkins are folded.  


Once you've done all the stitching - the magic happens with the folding.  I find the easiest way to fold these is to fold them in half, then grab the flat edge of the napkin about an inch from the center fold.  Using that mark, re-fold them in an off centered-half, then fold the corner back to meet that fold. 


Here are the napkins on this year's holiday table.  This 5-layered fold takes a bit more trial and error.  Honestly, I have to just keep folding and rearranging them until it's right.  Just keep in mind that the fold at the straight edge will be more angular and less straight like in the 4-fold version.  Feel free to pop over to the Carriage Corner Blog and read about my holiday table settings.  

October 31, 2017

Classic Oak Cardigan

Quite possibly, I should have posted about E's Little Grey Cardigan before sharing the cardigan that I made for her daddy - but that's not the way things work around here.  But - you will need a bit of the back story. 

So - when The Princess and The Sports Writer found out they were expecting, well they decided not to find out what they were having!  What's a crafty momma to do?  Well, I knit a grey sweater for the baby - could go either way, gender wise.  But while I was making it - I thought, wouldn't it be nice if I made something for The Sports Writer? So, I found a similar pattern ordered yarn and then moved across the country.  

Once we got settled - I got started knitting this bad boy.  Originally I had hoped to have it done by the baby shower - but that didn't happen - see moved across the country.  I finished this sweater this summer and then held it ransom until the kids came out here and I could get photos.  Ravelry says I started this sweater on November 12, 2016 and finished on August 30, 2017.  This was not my only project during that time.  


 So, as I said, I held this sweater ransom until the kids came out and I could get some pictures of it.  I wanted some of them together and some of them separate - but I'll take what I got.  

I'm so happy with the fit of this sweater - the sleeves are long enough, the length is perfect.  It's not too big - which I was worried about and the shawl collar is perfect.  


Here you can see the back of both sweaters - Daddy's sweater has more cabling than E's - but I love them both.  While the shoulder seams look a little bit dropped - that is the style of the sweater.  


Here you get a glimpse of E's sleeve and the cable panel on the front of Daddy's sweater.  This was a fun project and one I'm glad I took on.  Both sweaters were made with Cascade 220 in shades of gray.  Both of the sweaters close with leather buttons.  And both of them have their cuffs rolled up :)  

Thanks for letting me make these lovely sweaters for the family. 


October 24, 2017

Print Matching

While my wardrobe has become decidedly more casual - JB's has become a bit more dressy - if you will.  See - he helps in the kitchen in the morning, preparing the first course, helping plate & serve the main course and doing the dishes.  So, he's started wearing his bowling shirts with jeans.  Now he had quite a few that we've purchased over the years in Hawaii, Key West and at Disney and I've made him a few.  But he wanted more.  

The more I've made, the more I've wanted to get better at pattern matching over the button placket.  I still haven't figure out how to match the pattern at the side seams as well - but I figure the side seams aren't as noticeable as the button placket.  

So, I have no idea if this is right - but it's what I do and it works for me.  I thought maybe it would help some one else.  So - here goes nothing.  
UNCUT MCCALLS #4399 MENS SHIRT SEWING PATTERN SZ  CHEST S-M-L 34-36-38-40-42-44

I use McCalls 4399 mens shirt pattern which is long out of print.  My envelope has a date of 2004 on it.  Also I use view A, short sleeves with the side seams left open for a bit at the bottom.  

I trace 90% of my patterns onto exam table paper and keep the original pattern intact.  No real reason, it's just what I do. And in this case, I'm glad I've done that - I've made other changes to the pattern to add contrast fabrics.  

Anyway - once the fabric has been washed and ironed - I cut the shirt out single layer.  Cutting the left front shirt piece first.  I have to remind myself often that girls are always right and boys are left out.  So, the left front has the buttonholes and goes on top of the right front.  Once the front has been cut out - I then go over to the ironing board and fold the facing back on the center front line.  I know that this is not where the facing will ultimately be folded, but I figure if I can match the pattern at the center front - then it should match coming out of the placket - so far this has worked for me in actual practice.  
folded back on center front
Then, I take the left front back to the yardage and line the print up as close to an exact match as I can get.  Smoothing the left front over the yardage and making sure everything stays matched.   
Lining up the pattern at the center front
Next, I grab my pattern piece with the facing folded back and butt it right up against the left front - making sure I have my pattern piece the right way up.  I carefully lift up the folded facing and start pinning the tissue to the fabric, being careful not to shift anything.  Once the exposed part of the pattern is pinned in place, I remove the left front, fold the facing flat, finish pining and then cut the right front out.  

Tissue being placed next to left front - red line added to show pattern piece on top of yardage
For the pocket - before removing the tissue from the left front, I slip the pocket piece under the left front piece, matching the top of the pocket with the markings on the pattern piece.  Actually - I've found for JB, that the pocket is almost under his armpit when I put it where the pattern has it, so I move it a bit toward the center front.  

Once I have everything lined up the way I want it, I remove the shirt tissue and trace some large identifying designs onto the pocket pattern.  As I was cutting a bunch of shirts - I cut a bunch of pocket blanks.  I then match my really horrible drawings to the fabric, pin & cut.  


Once you've done all this, stack all the pieces together neatly.   Fold and put in a stack on the corner of your sewing table until you feel like assembling a bunch of shirts.  

I hope this helps someone else who's struggling with pattern matching.  As I said, it might not be proper way - but it works for me.  

October 17, 2017

Finally - A Concord for Me

Long ago in a far away land, I was a pattern tester for the Cashmerette Concord Tee.  At that time, I made a tee for The Musical One.  I loved it, she loved it - but I never made any more.  With this transition to a more casual wardrobe than what I'm used to - the concord has been buzzing around the edges of my mind lately. 

While I was working on something else, I pulled this lovely ITY Print that was a remnant from Carolyn's stash.  I loved it.  Honestly - I took horrible notes while I was making this - but here's what I remember:  I made a tabbed short sleeve, v-neck with the curved, faced hem.  I cut the length between the tee length and the tunic length - because that's what my fabric would allow.  I used a black and white polka dot remnant for the neckband, sleeve tabs and hem facing. 


While I love this top and how fluid it is - there are some things I could change in future versions.  


While I didn't really need the sleeve tabs for the short sleeves, I added them to add more of the polka dots.  I believe in the power of 3s when you are using an accent.  This helped.  Also, I love how the polka dot neckline looks lacey.  


Here - you can see from the side view that the back rides higher than the front - so for future versions, I need to add some length to the back pieces so the hem hangs even.  


And from the back view - I feel like I need a little bit of sway back adjustment.  

I know I graded between sizes, but don't remember which sizes I used.  The bust and sleeves are fine as are the waist, but the hips could use a bit more width.  I have plans to make this curved hem version into a dress - I think it will be fun and comfy and fit right into the kitchen of the B&B.  

October 10, 2017

Pumpkin Placemats

So, just when I think I'm back to blogging - I do something stupid like take photos for the blog then leave the camera in New Jersey when we were visiting the kids.  UGH.  So, I missed a week and my schedule is all off - but here I am again.  This time with a crafty project I just finished for Carriage Corner.  

I decided that pumpkin placemats were in order.  First, I did a search for a pumpkin embroidery design.  See the one I had was too small - but I liked that it had 3 color sections to the pumpkin.  I found a larger design that I could make work.  Then, I dug through the stash of quilting cottons to come up with 3 orange fabrics and 2 greens.  

Next up was creating templates for the applique fabrics. While the design I purchased came with 'cut' files - I don't have a machine for cutting fabric or vinyl so I have to do it myself.  To do this, I unthreaded my embroidery machine, put an old needle in, hooped stabilizer, and then placed regular printer paper on the embroidery hoop, pinning it in the corners.  I stitched out the first couple of colors, then changed the paper - to get templates for everything I needed - fabric 1 - the outer edges, fabric 2, the middle section, fabric 3 was the center of the pumpkin, the leaf & stem.  Because my design was only intended for 1 fabric, I had to get a little bit creative, I stitched the satin stitch that would go around fabric 2 and then traced the template shape.  It worked.  

Templates:  fabric 1 & 2; stem & leaf, fabric 2.
After that, I figured out what size I wanted my finished placemats to be and cut the background fabric to size.  I'm a lazy embroider-er and feel that there is too much room for error when hooping your main fabric.  I tend to hoop my stabilizer and then pin my fabric to it.  So, once I figured out where on the placemat I wanted that pumpkin to land - that's what I did.  The next photo shows my 'official placement.'  I folded the background fabric in half, lining it up with the center markings on my embroidery hoop and had the bottom edge of the fabric just touching the inside of the hoop.  Without moving the design, this positioned it perfectly for the plate to sit right over the embroidery once breakfast was served.  


I will admit - I embroidered a couple of pumpkins that couldn't be used.  And learned a few things in the process.  I had to remember to layer the fabrics all right side up when cutting the templates.  I used fusible basting spray to keep the pieces in position during embroidery.  


Once all the pumpkins were embroidered - a full house around here is 13 - but I made a set of 12.  Honestly, it rare that we have more than 10.  Plus, the only plates these placemats will work with currently are plain white and I only have enough to set a table for 8.  Yes, things can get confusing around here - but I try to always plan for 12 when purchasing or making table linens.  


Anyway - once the embroidery was done, I then cut strips of the green fabric used for the stems and stitched it to the sides of the placemat.  I then squared everything up, layered embroidered top, backing and batting.  Stitched around the outside, leaving an opening for turning.  Turned, pressed and then stitched around the outside a 1/4" from the edge.  


Here's the pumpkin side set this morning - there is a basket of gourd in the center of the table.  I don't like these green napkins with the placemats, but they are what I had this morning that worked.  

September 19, 2017

Eleanor's First Stocking

Oh Gosh - I still haven't introduced you all to E yet.  The Princess and The Sports Writer had a beautiful baby girl on January 23, 2017.  She is just the most perfect thing ever.  I strongly advise everyone to have grand kids.  :D

E wearing a dress her Mommy wore as a baby.
Ravelry says that back in 2009 - I decided to knit new Christmas stockings for our family of 4. Everyone picked their favorite color - JB chose Eagles Green; The Musical One = purple; The Princess = hot pink; and I got lime.  The 4 original stockings are the same.

The Princess, JB, Mine & The Musical One's stockings
Then, The Princess got married. So, it only seemed right that The Sports Writer got a stocking. His stocking is slightly different than The Princess' and the rest of the family. Similar but different. This was gifted to The Sports Writer in 2014, after the wedding.
Leg of The Princess' Sock
Leg of The Sports Writer's Sock
We picked a soft pink and white for E's First Christmas Stocking - I say first, because as she grows up, she might want a different color and I'm okay with that.  As you can see - E's sock is similar but different from the others.  I really love the striped instep on this one.  I love the way the stripes look and the snowflakes across the top of the foot.

E's First Stocking


My favorite photo of The Princess & Little E

September 13, 2017

New Sewing Room

Well - we've been in our new house and living this new life for close to a year now.  While our "Owner's Quarters" are much smaller than our home was in Seattle - there is plenty of room for us.  There is even room for us to have personal guests.  Oh - but that's a tour for another day - remind me, k?

Today, I thought I'd show you how I've set up my sewing space in our Owners Quarters.  Once again, we have a large walk-out basement space.  And I think I have just as much space as I had back in Seattle, only with more furniture.  So, when you go downstairs, the first thing you see is the fabric shelves.  Yes - I know they should be covered, and they will be - someday.  Probably before Eleanor can walk and starts pulling fabric off the shelves.  At the top of fabric shelves are baskets of yarn.


The old leather dual-recliner loveseat is downstairs along with 2 chairs.  {We move most of this furniture out for sewing retreats.}  Because Beau couldn't manage the stairs very well, we started spending our evenings downstairs.  We have the seating and a large tv down here.


Immediately to the left of the fabric shelves is the little shelve which holds my envelope patterns. The top bins have button overflow and zipper storage and the basket on the window ledge holds fusibles.


Behind the chairs, is my sewing desk.  It's the same one I had in Seattle.  It holds all 3 of the machines - although I'm not sure the newest one will be out all the time.  I've been moving them around to set the sewing machine up for embroidery and still be able to sew - hence the newest one.  


Behind my sewing chair, is my cutting table.  I lost the storage under it when we chose to put the dog crates under there.  This truly was for the best, because the crates are large and Jethro & Stella still sleep in them.  So reorganizing was a priority.  As you can tell - I did not clean up to take these photos - I was getting ready for shirt cutting and holiday sewing prep.  I do tend to clean up between each project, however.


Behind the cutting table is my ironing board and iron.  I keep it set up all the time.  The door go out to our fenced yard.  


Finally, at the end of my sewing desk is a bookcase which holds my sewing and knitting reference books, binders of knitting patterns, and my Threads and Ottobre magazines.

So - my space is spread out and yet just a bit more compact than it was before.  We spend more time down here.  There is also a full kitchen, dining room and half bath - which is why it works so well for the retreats.  Sorry for the mess - but welcome to my new sewing room.

August 21, 2017

Pressing Matters

One of the other things that Miss Carolyn suggested that JB make is the multi-point pressing tool with attached clapper.  I'm sure there is a different 'real' name for this - but that's what I'm calling it.  The tool at the top has many uses - to get into corners - I can't wait to use this to press tiny little collars on sweet dresses for Miss E.  Plus there's the matter of my Fall wardrobe being filled with buttondown shirts - it will happen.

While perfecting the shape of the tool, JB created an interesting point.  It's curved from the widest spot of the piece to the point.  This allows it to be stronger and get into tight spots.  The top of the tool measures roughly 3/4" wide.

Along that top edge you can press a sleeve seam or any seam really.  The wood on all the tools is unfinished and has been sanded smooth so it won't catch on any fabric you happen to be using.  And that tiny little curve on the back end - well you can press curves over it too.


The arc for your hand varies in height from 2" to 2 1/2" depending on the stock he had to work with for the multi-point handle.  But, I haven't felt one that is 'tight' for my giant hands.  The tool fits comfortable in your hand, allowing you to use the handle to apply pressure when using the clapper.


We've already sold a few since this photo was taken, but aren't the colors in the various woods beautiful?  I've put up individual photos on the Pressing Matters tab (up top).  All of the tools sell for $40 and ship in a medium flat rate box.   We have been including a little bonus tool in the box as well.  We are willing to ship anywhere in the world.  If you are interested - click over to the Pressing Matters tab, leave a comment with the number of the tool you would like and a way to get in touch with you.   I'll reply to your comment and send an invoice via paypal.

If you would like a coordinating set with shoulder curve and multi-point let me know.  The shoulders will all be oak, but the base can match either the 'handle' or the clapper portion of your multi-point tool.
LinkWithin Related Stories Widget for Blogs