Showing posts with label quilting. Show all posts

March 31, 2022

Eleanor's Gingham Quilt

    It all started with a picture on Instagram.  I mean, isn't that how all good stories start?  Miss Andrea Quilts posted a picture of a gingham baby quilt that she made.  And it was stunning! 

    Fast forward a few months and I made a whole cloth quilt for baby Harris (Harris is Eleanor's baby brother).  I have also recently (in the last couple of years) finished Krystle's wedding quilt.  So, it was time to make Eleanor a quilt.

    They came to visit for Thanksgiving.  Miss Eleanor is a little bit opinionated (but she comes by it honestly) and I'm not the greatest at matching fabric so I wanted both her and her mom's input on the fabric selection.

I found this free pattern and used it.  I still have 2 pillowcases to quilt.  Don't judge me.  

I knew the quilt was going to be gingham in design and that E wanted pinks or purples.  In my research, I had found some beautiful quilts where the medium was a print - and I really, wanted that look.  So we started with a dark solid purple and white.  Then found the tiny purple print.  The backing and binding were no brainers - we just pulled them from the same fabric line as the print fabric.  Easy peasy!  


Fast forward to January 12th.  Fifth birthday party is coming up in 13 days and I still have just a stack of fabrics.  Fortunately, I was busy with running Carriage Corner and didn't even start cutting the fabric strips until Friday, January 14th.  I was determined and had the entire top put together by the end of Sunday!  

Whew!  On track to make it to the birthday party with gift in hand!  Except when I put it on our queen size quest bed - it looked huge!  Do I take some rows off?  


The next Thursday, I was able to pin baste the backing, batting and top together and start quilting.  I quilted the entire quilt on my home machine using a walking foot, cotton quilting thread in pale pink on the front and a bluish green on the back.  The quilting lines are 1/4" on either side of every seam line!  Really play up the gingham effect!  

By Friday night (2 days before the party) I had sewn the binding on.  I stitched the binding on the back by hand with big stitch binding.  I used pink perle cotton thread and did a large running stitch to hold the binding in place.  I literally carried the quilt with me all day Saturday, stitching in the car when I had a chance!


Around 9p Saturday, I finished the quilt!  Yeah!!  And I threw it in the washer.  First thing Sunday morning it went into the dryer.  I took it out, folded it up and promptly forgot it when we left for the party!  

Eleanor got her birthday quilt


about 2 weeks later in February when they came to visit.  If you ask her she had a great weekend!  She came to visit Gigi & Gramps, went to an ice festival and Gigi made her a pink quilt that's so cozy and she sleeps better!  All worth it in the end.

And as you can see from the photos - it fits her twin bed perfectly!  She already has the pillow case that matches the backing.  She'll get the other two soon - just as soon as I make her Easter dress.

November 21, 2019

Jelly Roll Rug & Placemats

Last year - 2018 - I took a class to learn to make a JellyRoll Rug at a darling local shop.  Oh, and if you are interested - Carriage Corner has partnered with The Old Country Store to offer a discount to guests attending classes. 

Anyway - I had seen Jelly Roll rugs on Instagram and I was smitten!  Bitten hard by the want to make my own rug.  I even had a jelly roll purchased - I just hadn't started yet.  So, I signed up for the class and had a wonderful time!  So wonderful in fact, that I purchased a stack of fabrics to make jelly roll placemats for Carriage Corner.
Stack of fabrics in our basic theme colors

To make 12 placemats, I purchased 1 yard each of 8 fabrics. You can now purchase a pattern for jelly roll placemats and I would urge you to do so, but there wasn't one available at the time, so I created my own.  Also - I wanted an oval placemat, just like my rug, although I'm really digging the rectangles now too.

Anyway - I'm going to give you a pictorial of what I did - but without too many instructions, because you know, we should be supporting other makers.  So, if you love the idea of making your own oval placemats, please purchase the original rug pattern and have a ball.


I cut all of my fabrics into 2 1/2" wide strips - the size of a jelly roll strip!  And then I seamed each fabric together in the order I wanted them using a diagonal seam - just like you would seam bias strips together.

There is a narrower strip of batting in the middle of the fabric strip and then the ends are folded over and then folded to the center - think bias tape.


Sew the end with the fold so it doesn't come unfolded.  I found my blind hem foot to be the perfect tool for this step.


The end of the stripe needs to be tapered so it looks pretty when you finish.

 Figure out how long you want the center of your placemat to be.

 Ease around the corners.  Stop when necessary and press everything flat.
 Sew the strips together with a zig zag stitch.  Keeping the seam you already sewed oriented in the same direction at all times.


Stand back and admire the first placemat you finish.  Hope you can make 11 more just like it!  They are similar, but not all exactly the same shape, even though I started the same each time.

I saw a beautiful one fabric rectangular Jelly Roll rug on IG and I think the next time I head to The Old Country Store, I might pick up the rectangular pattern and then use some of my large pieces of quilting cotton to make some new bath mats for our guest rooms.  Because these cotton rugs filled with cotton batting are nice.  And they launder well, and I need new bath mats! 

What's your favorite item you've made for your home? 

April 18, 2011

Quilting?

Remember when I shared the quilt top I had made for the Princess?  I started this project when she was in middle school - gathering the fabrics, planning a layout, etc.

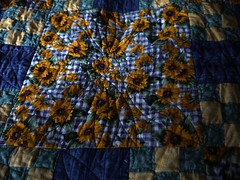
About the time we had all the fabrics together and were happy - she had about grown out of sunflowers.  Well then I needed something to sew and didn't want to make clothes (the horror!) so I put this together anyway.  When she was a senior in high school .  You can see the finished top here.

Last Summer I was talking to a friend of mine who has a long arm - because honestly I was going to farm it out for quilting and pay someone.  This woman is a fantastic quilter - loves playing with her machine and learning new things.  The layout on this quilt gave her the perfect place to play - and honestly, I did not care what was done to the quilt - I just wanted it done.

When she offered to quilt it - I jumped at the chance.   Like I said she does beautiful work.  She asked some very important questions - like how will she use it - apparently if you are going to wrap up in the quilt, then you want less quilting so the quilt is not stiff and hard.


This quilt is fabulous and flexible and cushy and warm.  Now The Princess is waiting on me to find a box big enough so I can mail it to her.  She might have a minute to wait since I just mailed these on Friday!

edited to add lightened photos.

August 19, 2009

Quilting?

Ever since Melly posted a link to rachel's disappearing 9 patch tutorial I have been possessed.
Then last month I saw one a friend had made that was stunning. Absolutely stunning. I can't stop thinking about it.
Last weekend [after taking Melly to breakfast] I bought a whole bunch of fabric to make a quilt. What in the world has happened to me?

August 5, 2009

This is How Much of a Dork I Am

The red pot. The one that was used for the tutorial on how to build your own beautiful umbrella stand. It was for my new clothesline! yep! I love it. I have wanted one for awhile - finally, I couldn't stand it any longer and went on an all out hunt to find one. It's had 2 loads of laundry on it already. i love air dried clothes - I'm pretty sure there isn't much of anything better - plus look how great it is for showing off finished sewing projects. Hey Miss D - I had a photo shoot in my mind just for you, but JB wouldn't cooperate. High heels, skirt, apron and pegging out the laundry. I'm sure you can imagine it. So - that quilt hanging on my line right now? Well I made that top during The Princess' senior year in high school. And then she decided she didn't like sunflowers any more. A week or so ago - she yelled at me and got really mad because both The Musical One and Miss L have quilts that I made and she doesn't. So, I offered to attempt to finish this one up before she drives to Connecticut at the end of this month. But of course, she can't decide if she likes it and would actually use it - so here it is kiddo. Let me know so I have time to layer and quilt it :)

December 1, 2008

Quilting for Camilla

Let me just start by saying - I am not a quilter. Camilla asked for help making quilts to warm and comfort a family who lost those father last Monday. Because I believe what goes around comes around, I like to help where I can. Therefore, I agreed to make 6 quilt blocks for this effort.
The one pictured on the left is one of my favorites and I may try to recreate it once or twice more. As well as these two black and orange blocks, I made three random pink blocks. I really admire the random blocks made by Beki and Erin, I just can't do it.
Next I pulled out three coordinating prints from Denyse Schmidt's Katie Jump Rope and cut 2.5" strips. Then I sewed them together and cut them apart. I know - if I'm going to take perfectly good fabric and cut it up - I'd rather have something to wear at the end of it. Anyway, I then sewed them back together into what I believe is a rail fence quilt pattern. I had enough strips cut to sew up 16 blocks. I am also sending the remaining fabric - just in case either Cami or the quilter want to use it to finish up.
Finally, I grabbed this red and white snails trail quilt top that I made in my piecing days. I love 2 color quilts - but I know that I will never finish this and it's just taking up space in my house. I picked up my phone and called Cami asking her if she would like to have it. She agreed, so once it arrives she will have one top done -- 5 more to go. If you are interested in making a square, please see the link to Cami's post above, or contact her directly at camillaknitsATgmailDOTcom for details and mailing information.

September 5, 2008

It's Official, The Neighbors Think (know) I'm Crazy!

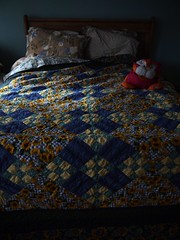
Miss C owns a brick and mortar yarn and quilting fabric store. She stocks the entire line of amy butler - well I guess that's not technically correct, the carries the complete older lines, she doesn't have the full line of the new stuff. Anyway - click on the link to her blog and you'll see that she just got some new fabric delivered. She is a quilter at heart and a sock knitter. Anyway - I left a smart comment about how quilting cottons are so much more useful than for just quilts. I mean seriously people - think outside the box. That lead to a phone call which evolved into a discussion of the fact that I have in fact sampled the quilting bug. This is by far my favorite quilt top. It's only a top as it isn't quilted. And while you can't tell from the photo - it's huge! Bigger than king size. It's a top that I made in a class and actually finished. I has 12 different fabrics from dark to light. I went from white to a dark rose. Here's a close up of the center of the quilt. The blocks tessellate (meaning they are all the same, just rotated to fit together). This was a fairly easy pattern to sew and it is all straight seams and nothing was 'inset.' I had remembered last night that it was assembled in straight rows, but looking at it I can tell I was wrong - it was assembled in diagonal rows. There are 2 blocks that repeat throughout the quilt. The large (3") solid square which is then surrounded by 4 little 4 patches. The strategic placement of colors in the 4 patches create the elongated "X" for lack of a better description. So, why do the neighbors think I'm crazy? Well at 7:10 this morning I was walking around the yard in my robe. Abby was in the front with me and we were looking for a place to hang the quilt so I could get a photo of most of it. The neighbors where on their deck having morning coffee. They already love our yard - I'm sure they will enjoy the quilt all day. See - when I threw it over the arbor, I didn't completely unfold it and when I tried to pull it down - it got stuck on the cross bar! So - it will stay there until I drag a ladder out to get it down. So - in the end I have made a few quilt tops, but I don't enjoy it. I have a hard time matching fabrics. I agonize over it, questioning every choice. I don't enjoy putting the blocks together and obviously I have no desire to finish them. I would much rather take a beautiful piece of quilting cotton and make a skirt or pillowcases!

March 12, 2008

How About a Quilt?

Once upon a time I ventured into quilting. My very first quilt was actually a duvet cover which was done in primary colors when my young family lived in England. My first husband was in the Air Force and we were stationed there - anyway - I made a pieced duvet cover for The Musical One's first 'big bed.' I can't remember when I made this top (because it's still only a pieced top) but I know it was while JB and I still lived in our first hours and most likely pre-Dudley dog - so probably about 9-10 years ago. Might be time to think about finishing it! The fabrics were all pre-picked in a block of the month package put together by a now defunct quilting store. Each month you purchased your zip lock baggies with all the fabric and instructions. With the first package you needed to purchase a set of Marti Michell templates. The blocks were fairly easy and lucky for the quilters out there - I didn't press this quilt, just laid it over my kitchen table and took the picture - otherwise you could tell where all the corners don't match! I have all the fabric for the backing - maybe it's finally time to finish it. Cami didn't you say you know someone I can send all the parts to who will finish it?
LinkWithin Related Stories Widget for Blogs